Originally this started as a collection of photos I wanted to post. I was a novice photographer when I started this blog. Now I have learnt some of the tricks of the trade and can call myself an amateur. I will use this blog to highlight some of my works and also some tricks/tips which I think may be useful to others.

Saturday, April 25, 2009

Slow Shutter Speed

I have not got the time to do any photography for the last few days, and hence my blog was dry for more than a month. I still do not have any new photos to show, so I decided to do a new article with some of my earlier shots.

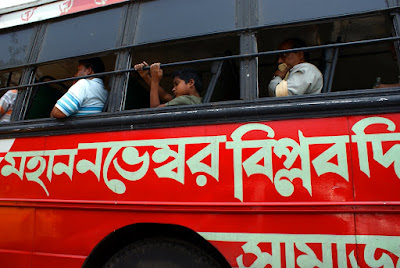
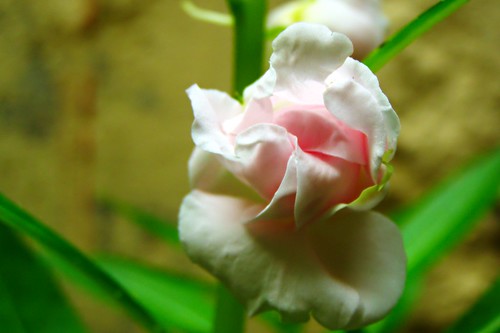
Slow shutter speed can really make stunning effects on a photo. For example in the following shot, the slow shutter speed makes the lighted parts of the picture very fluid. Of course I used a tripod, to avoid camera shake.

Rainy Night in Jersey City
Camera: Sony DSLR-A300 Exposure: 0.167 sec (1/6) Aperture: f/4.5Focal Length: 75 mm ISO Speed: 800

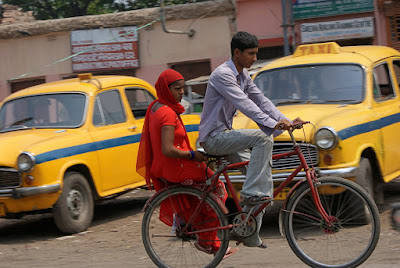
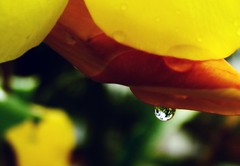
The next photo also, on the similar lines, taken with my Olympus SP510UZ, with a very long exposure of 15 seconds. I had to choose 1/6 second in the previous one as there was some motion in the car which I did not want to get blurred, but in this one, since everything is very static, I had the luxury of a very long exposure.


From Blog


ISO: 100 Exposure: 15.0 sec Aperture: 8.0 Focal Length: 10.9mm

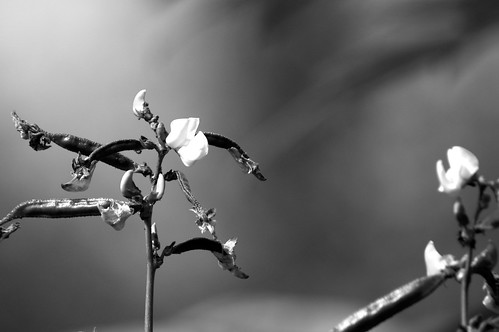
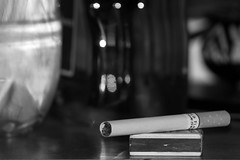
The third example is a waterfall. Shooting a water fall with a slow shutter speed, will blur the movement of the water, creating a nice visual effect.

Dingman's falls

Exposure: 0.167 sec (1/6) Aperture: f/8 Focal Length: 17.5 mm ISO Speed: 200

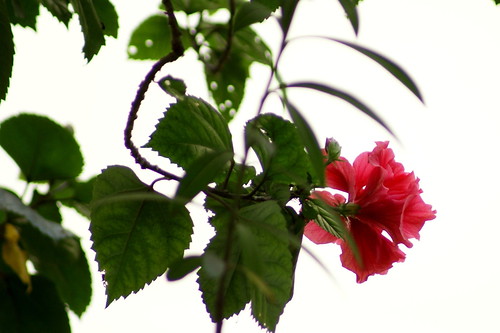
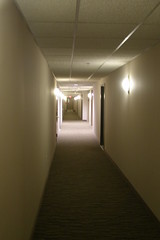
The fourth shot is the same waterfall. I handheld both shots as I was not carrying a tripod.

From Blog


ISO: 200 Exposure: 1/6 sec Aperture: 8.0 Focal Length: 6.3mm

One equipment that would have made the fourth shot better, but unfortunately I do not possess, is a graduated neutral density filter. You can see that the sky has blown out highlights. A graduated neutral density filter will have a gradient from gery to white, thus evening out the exposure where there is a zone with intense light while another is muted light.
Do try out taking long exposure shots. Let me know how it goes.

Saturday, March 28, 2009

Kolkata Part 2: Street Photography on a hot Sunday Afternoon

Sunday afternoon, I was on a small trip to a relatives house. I decided to take my camera with me, to capture some of the street scenes of Kolkata. Since I was in a moving car, composition was a big challenge, and most of the images came with a motion blur. Most of the photographs are technically not that great, but I have posted some of the images which I liked a lot personally. I will post them chronologically, to give an idea of my route.

The first shot ... taken near my house. A cyclist is being followed by a bus near the red shiva temple, Central Avenue , near Sovabazzar Metro.
From Blog

ISO: 100 Exposure: 1/250 sec Aperture: 8.0 Focal Length: 20mm

The second shot. taken near Dunlop bridge crossing, on BT Road. Grafitti on a city bus. This is one of my favorites from this session.

From Blog

ISO: 100 Exposure: 1/50 sec Aperture: 11.0 Focal Length: 18mm

The third shot. A parked truck on BT Road, while a man urinating in front of it.
From Blog

ISO: 100 Exposure: 1/125 sec Aperture: 11.0 Focal Length: 20mm

The fourth shot. A young couple on a bicycle near Sodepur.
From Blog

ISO: 100 Exposure: 1/100 sec Aperture: 11.0 Focal Length: 70mm

The fifth shot. A couple of middle-aged men on their way back from the vegetable market. Shot at Sodepur, BT Road Junction
From Blog

ISO: 100 Exposure: 1/160 sec Aperture: 11.0 Focal Length: 40mm

The sixth shot. I feel the story is very symbolic. A cigarette, pan and guthka store, youth on motor-cycle, and political graffiti.
From Blog

ISO: 100 Exposure: 1/40 sec Aperture: 11.0 Focal Length: 70mm

The seventh shot. I wanted to capture this for a long time. However my driver never stopped, so I got shots with motion blur. Weekly make-shift clothes market at Titagarh, BT Road. I love the subject, so I will do a better job on it the next time.
From Blog

ISO: 100 Exposure: 1/80 sec Aperture: 11.0 Focal Length: 18mm

The last shot. Three stories unfold on station road, Barrackpore.
From Blog

ISO: 100 Exposure: 1/100 sec Aperture: 11.0 Focal Length: 70mm

Do let me what do you think, and what you would have done to make the shots better.

Friday, March 20, 2009

Portrait Project: Photographing my son

A couple of weeks back, my son was just learning to take the first few steps on his own, and I tried to capture some of the moods he was showing. It was very trying on the patience, as the moment you thought you were having a good composition, he would change it, before you could focus on him. He has also become very camera concious lately, and would wonder what his "Daddy" is up to, when I would point the camera at him. In the end I got a few shots, and I will post them here, for you to figure out, how I have fared.

TIP BTW, One of the key virtues for a good photographers is patience. You need to have patience in order to get the perfect shot!!!
Photog


The shot was done in two parts, during the day, it was a wee bit of ambient light and most of the lighting is through my in-camera flash. In the evening, I used my wireless flash bounced off a white ceiling.


The first shot: In photographic grammer, this shot has a big mistake. My wife's legs are visible which is cluttering the frame. I like this shot very much though and decided to keep it in the post. I hope my readers will excuse me for the mistake.

From Mar08-09


Technical Data: ISO: 100, Exposure: 1/60 sec Aperture: 5.6 Focal Length: 45mm Flash Used: In-camera

The second shot: Against the door
From Mar08-09


Technical data: ISO: 100, Exposure: 1/100 sec Aperture: 5.6 Focal Length: 60mm Flash Used: In-camera

The third shot: Papa, see my acrobatics
From Mar08-09


Technical data: ISO: 100, Exposure: 1/60 sec Aperture: 5.6 Focal Length: 35mm Flash Used: In-camera

The fourth shot: Smile Please!!!
From Mar08-09


Technical data: ISO: 100, Exposure: 1/125 sec Aperture: 5.6 Focal Length: 70mm Flash Used: In-camera

The fifth shot: Cupboard is sooo good!!!
From Mar08-09


Technical data: ISO: 100, Exposure: 1/60 sec Aperture: 5 Focal Length: 28mm Flash Used: In-camera

The second set was shot during his dinner, using an off-camera wireless flash bounced of a white ceiling.

The sixth shot: Making faces
From Mar08-09


Technical data: ISO: 400, Exposure: 1/60 sec Aperture: 5.6 Focal Length: 28mm Flash Used: Off-camera, diffused using ceiling-bounce

The seventh shot: Why do I have to eat, mama?

From Mar08-09

Technical data: ISO: 400, Exposure: 1/60 sec Aperture: 5.6 Focal Length: 60mm Flash Used: Off-camera, diffused using ceiling-bounce

The eighth shot: I guess dinner is over!!!
From Mar08-09

Technical data: ISO: 400, Exposure: 1/60 sec Aperture: 5.6 Focal Length: 40mm Flash Used: Off-camera, diffused using ceiling-bounce

The ninth shot: Oh no!!! More food
From Mar08-09

Technical data: ISO: 400, Exposure: 1/60 sec Aperture: 5.6 Focal Length: 70mm Flash Used: Off-camera, diffused using ceiling-bounce

The tenth shot: I hate eating!!!
From Mar08-09

Technical data: ISO: 400, Exposure: 1/60 sec Aperture: 5.6 Focal Length: 70mm Flash Used: Off-camera, diffused using ceiling-bounce

All shots taken with my Sony Alpha300. Let me know what do you think!!!

Friday, March 06, 2009

Shooting a photo frame by candlelight

This week, I undertook an abstract project. The electric power was off, so I had lit a candle and placed in front of a photo-frame, containing photo's of my family. The warm light of the candle created an interesting mood in the room, and the photo-frame, accentuated by the low light looked absolutely beautiful.
I was thinking about it for some time, but then my wife asked me to get the camera: and here are the results.

First: The candle

Warmth

Second: The candle light falling on the framed picture of my son and me.

From Blog


Third: The whole assembly of the photo-frame and the candle-stand.

From Blog


The photos were shot in low light and the second and third with very high ISO settings, making it grainy. I am still very proud of these shots, as I re-live the ambience every time I look at them. Let me know how do you feel about them.

Saturday, February 28, 2009

Shooting Flowers


Flower photography is probably the first step many people take, in their journey from becoming a trigger happy point and shoot, to an amateur photographer. Flowers are beautiful, and we can take stunning flower photographs quite easily. To have a good flower shoot, I would recommend using a camera with "aperture priority" (or full manual), so that you have more control on the depth of field.

Few small tips: however, be prepared to break them at your will.

  • Use a shallow depth of field
    This will make your flower stand out from its background, and also create interesting bokeh in the background

  • Take an unusual viewpoint
    If you shoot flowers at an angle in which we normally don't see them, it will create a stunning composition.

  • Shoot on a black background
    Black background will make your flowers more vivid and powerful. For example, you can hold a black cardboard or cloth in the background. Being a purist though, I do not follow this tip myself: if a black background is not available naturally, I shoot with the available background

  • Dew drops on flowers improve the beauty of the flower
    Again, though personally I have never created artificial dew, you can do it by spraying some water on the flower before you shoot


Now, some of my flower shots.
Flowers and vegetables
In this photo I have broken the convention that a flower should be shot in color. In the original shot, the flower was white on a green background. Converting it to black and white has created more impact I believe.

Happy Holidays!!!

I have shot this one with a black background. I framed the flowers against a black water tank.

Cognizant Team Picnic 2008: Hibiscus flower

I have shot this one against an overexposed sky as background, turning it into white. The depth of field is not very shallow, so the leaves are also in partial focus.

A thing of beauty is a Joy Forever

This was taken with a prosumer "point and shoot" camera. Olympus SP510UZ, which I used before buying my Sony A300 SLR.

From Blog


This is a hibiscus flower shot in the warm evening sunlight during sunset.

Let me know if you liked this post. Show me some of your own flower shots

Friday, February 13, 2009

Photography Project: "The Moon"

One evening, after coming back from office, I was lazing and looking out of the window, when I saw the full moon rising. There was a cloud cover, and the sight was spectacular. I immediately got my camera and tripod, and started to shoot. For the first few shots, I noticed that I have been getting horrible camera shakes. I immediately figured out that it is my tripod and shutter assembly. I use a cheap Walmart brand tripod ($28 or so) which was not sturdy enough to support my heavy Alpha 300 camera and its 75-300 mm Zoom lens. The slight vibration I was getting from me pressing the shutter, was enough to blur out the photo at 300 mm Zoom. The tripod was not helping me either by damping out the vibrations.

I don't have a remote cable release, so I remembered a tip from one of the photographic books: (I don't remember the book, but I am thanking the author all the same, and I think will be a very useful tip to everyone who does not have a cable shutter release) I started to shoot with a 2 second self timer, so that the vibration arising from my pressing the shutter is dampened by the time the shutter opens. I got mixed results (curse my tripod which was not dampening the vibrations in 2 seconds). And finally I shot with a full 10 second self timer.

I ended up with 40 shots. (Including the ones with the camera shake). I tried various ISO and shutter speed combinations, keeping the aperature at F5.6 (Widest my lens has at 300 mm ). I was heavily biased towards ISO 100 though, being my favourite speed.

Finally the results I want to show. The first shot shows the moon riding the clouds. Buy prints from deviant Art


The moon was a ghostly galleon by ~Shubhrajit on deviantART

The second shot is similar, except shot at a slower shutter speed, so the cloud motions have blurred, giving it an impressionistic look.

From Blog


The third is a close up shot, with light reading on the moon, showing the terrains and textures on the moon. Heavily cropped so the size is small.

From Blog


Let me know what do you think?

Saturday, January 31, 2009

Using bokeh as a background element

"Bokeh" is a fancy term for blur!!! As defined by Wikipedia, bokeh refers to the appearance of out-of-focus areas in an image produced by a camera lens using a shallow depth of field
In an image we want our subject to stand out from its surroundings. Hence a bokeh will remove distracting backgrounds from claiming attention in photos. Many creative photographers will use bokeh as the main subject, but in this post I will stick to examples where I have used it as background element.

First one to start with is a portrait of my wife. The background is busy, but I have blurred it out to keep the attention on my subject.

From Blog


The second is an extreme example of a Bokeh. The entire background is made completely blurred with the subject in focus. This is one shot I am very proud of: (View it in large in my Flickr photo album)
Flowers and vegetables

The third one is also a flower shot with small bokeh in foreground and a larger more out of focus bokeh in background.

Shubhrajit's day out: Watercolors in the rain

The last in today's series is a planned treatment of mine. The bokeh is not very asthetically pleasing, but I believe it blends well with the subject and my treatment.
Smoking is injurious to health
Let me know how you feel about these photos and show me yours.

Sunday, January 25, 2009

Photographing the perfect sunset

Sunset has been the favorite subject of photography, due to the rich, warm tones cast by the slanting rays. Every sunset we see, stirs something within us, and when we look back at them, we re-live the memories that happened at that particular date/time. However, the viewers of the photo, who was not there with us and who has seen a lot of sunset photos may not find them as interesting as we seem to see it.

I have shot many sunset scenes, but there was only one shoot which I feel have enough substance to justify being a post in my photographic blog. It had all the elements to create a spectacular sunset portfolio.

So what makes a sunset photo interesting. As quoted by some professional photographers, the sunset should be complimented by a interesting backdrop and a perfectly still water in front to create a stunning reflection.

I will post here four images, shot at the catskill mountains. The peaks provide the backdrop, while the Ashokan Reservoir gives that perfectly still water reflections. Do judge them and tell me what you think.

Interestingly, I was without a camera during the shoot, so my friend's wife kindly let me have her Panasonic Lumix "point and shoot" to do my "own stuff". My friend on the other hand was using his Nikon D80 and at my insistance was using RAW mode for the shoot.

Ok ... here goes the first one ... shot by my friend Sumit Mishra with his D80. Converted to JPG and post processing by me.

From Blog


The second one was also shot by my friend in his D80. Converted to JPG and post processing by me. I have converted it to Black and White as I feel in a proper sunset shot, BW removes the warm color, and your tonal ranges stand out. Let me know what you think.

From Blog


The third and fourth was shot by me with a Panasonic Lumix point-and-shoot. You can see for yourself that the results are comparable to the Nikon D80. This firmly asserts my conviction that great photos depend more on the ambience and the photographer and less on the equipment. By the way, I felt that Panasonic Lumix cameras are the best point-and-shoot I have ever seen, so if you are thinking of buying a point and shoot, do evaluate these as your options.

In both the photos, I have silhouetted my friends in foreground to give another dimention to the photo. Let me know if you like them (or not)

From Blog

From Blog

Saturday, January 17, 2009

Photographing the abstract

This is the one of the most debated aspect of photography. I might photograph something abstract and it might be of great interest to me, but it may not appeal to the general viewer.
The reason for abstract photography : well in my case, living in a jungle of concrete, I don't get enough chance to shoot nature, so after a time, I get bored with shooting whatever I do, and dwell in the realm of abstract. Judge for yourself, if you can identify and enjoy some of the images posted here.

The first one I will start with is a shadow picture. I have a dancing girl statue, which was lit with bedroom lighting. The two lights cast directional shadows on the wall, and I decided to shoot the line-up. Taken with my point-and-shoot Olympus SP510UZ.
Shadows

The next one is a great favorite of mine. I shot this in the corridor of our apartment complex during my short trip to USA. I like the composition because of the guiding lines, the minimalism and the tones, making it very simple. Taken with my point-and-shoot Olympus SP510UZ. (At that time I only owned one camera).
Unedited: "The Passage"

This one is first of my two shots, which made to explore. This won't be properly visible in a monitor with high contrast, so in case you don't see this properly, please pardon me. I use an IBM R series laptop and the soft variations of tone are visible in my monitor.
Crystal Ball Gazing

The fourth one (and the fifth) I am showing here are the photos of the same object. I have a CFL (Compact fluoroscent Lamp) in my bedroom, and sometimes I make it the subject of my photographs.

Simplicity

the same lamp, in a different orientation ... makes another interesting composition.
From Blog


The last photo in today's set is a picture of a toy plastic tumbler with LEDs fitted. The LEDs has cast a strange glow making it a strange composition.

What is this?

I hope you like some of the results posted above. Let me know how you feel of these. Show me your abstract photos. I have some more which I will post in a future article.

Saturday, January 10, 2009

My experiements (And probably Failures) with Portrait Lighting: Portrait 151

Use of lighting can make your portraits very interesting. Now, if you are a portrait photographer who shoots outside, then you don't have a problem. Sun is a brilliant light source for portrait photography and you get to work with a big field, so you can control your depth of field to blur your background suitably.
If you are a professional and have access to a studio, you are also good to go. Studio's offer you a lot of lighting to be creative.

Now what happens to amateur photo enthusiasts like us, who need to shoot within cramped furnishings of our house? This is a big challenge, specifically so, you are probably under a strict budget, and lack of access to a studio means that you are shooting against a clutter.

Recently I have bought a set of Vivitar wireless flashes (See below) for my portrait work within the cramped spaces of my house.

My new toys

These flashes provide lighting of a wonderful color temperature (5500K) and light the subjects very well. However I am still finding it a little difficult to control these flashes with my Sony Alpha300.

The first two pictures I am going to show is perfectly balanced lighting, bounced of the ceiling. I have used 1 flash for the photo of my son, and two flashes for the photo of my wife. The flashes are bounced of the ceiling and the color of the walls have set a color cast.


From Blog

From Blog


Both of the above images have light which is diffused and is well balanced. Now lets see what happens, when I tried to use a light which is more directional. In the following photo, my wife was busy doing some chores, when I put two directional flashes on her face from a distance. The face is a bit washed out (the flashes are manual and have a very high intensity), but it gives a bit of a mood to the photo. (Judge it for yourselves)
From Blog

Another interesting thing I have found out originating from a mistake. When I am bouncing a flash from the sky, sometimes it gets deflected out of the ceiling fan if I have not positioned the flash correctly. Now this gives rise to some photo effects which I found interesting ... apparently very few others did, but I have included one such example here anyway: afterall the mistakes should also be published.
Rinki
The last photo I would like to publish in todays article when I was shooting my sister-in-law. I was using multiple directional flashes, and my mistake in balancing the intensity and direction produced some interesting shadows. One such example posted below:
From Blog


If you have read this upto here, you might be wondering what is it I am trying to say through this post. Well, I believe photography is a creative pursuit, and if you dare to digress from what everyone does, while still keeping in mind the basic rules of good photography, you will bring out something which will be cherished by you. This post is titled lighting, as lighting is one aspect which can generate a lot of interest in the photo.
Do let me know what do you think. If you have suggestions, please post them as comments.